
I recently upgraded the hardware of my desktop and here is my experience with the new hardware. The upgrade consists of:
- Motherboard: Gigabyte GA-MA790FXT-UD5P (Product page)
- CPU: AMD Phenom II X4 810 Processor 2.6Ghz AM3 socket (Specs)
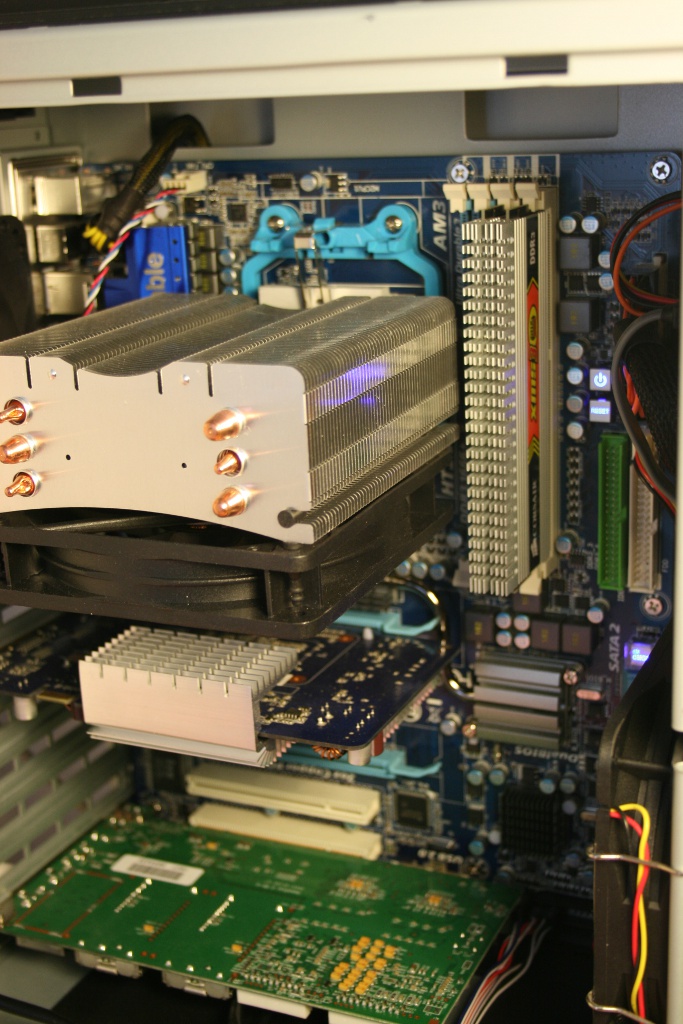
- CPU cooler: Xigmatek HDT-S1283 Cooler (Product page)
- RAM: Corsair 4Gb DDR3 XMS3 DHX PC10600 1333MHz (Product page)
I reused my Hauppauge PVR-500, Nvidia GS-7300 and 3x500Gb Seagate harddrives (raid5+LVM).
Installation
The motherboard with attached CPU cooler fits nicely into my Antec P182.
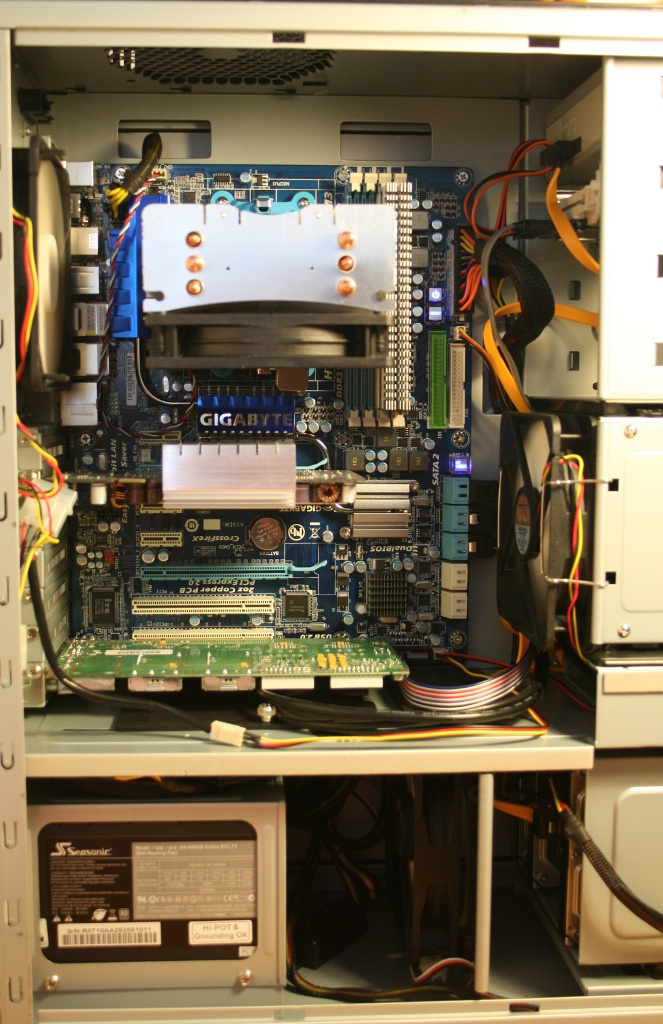
The CPU cooler can only be installed on a socket AM3 motherboard in such a way that the fan either blows up (towards the top of the case) or down (towards the PCI-e slots). When the cooler is mounted in this way, it also means that the lowest fins on the heatsink extends over the two first RAM slots. This might not normally cause any problems, but because the Corsair memory modules have headspreaders attached, they are rather tall, preventing them from being placed below the fins. The solution is to place the modules in the last 2 slots. I choose to install the cooler so the fan blows air hot upwards and out of the case’s top vents.
BIOS
The default version shipped with the motherboard does not have legacy USB keyboard support enabled, which means there is no keyboard in GRUB (when Linux is booted there is no problem). I didn’t notice if there was a option to enabled it, I just updated to the newest version at the time (version F5c) which fixed it. Updating the BIOS just require a USB thumbdrive formattet with FAT32, and the extracted BIOS file (use unrar to extract it from the .exe file). While tweaking the BIOS I switched all SATA drives to AHCI, to get the most from the drives in Linux, and set the memory frequency to 1333MHz.
OS
To match the new hardware I also switched from Arch Linux x686 to Arch Linux x86_64. I have not experienced any crashes or trouble after switching to the new hardware, so the hardware is 100% Linux compatible. There might be problems with older kernels, but I can confirm that it works with 2.6.28 or newer.
Update the 01-Aug-2009: attached dmesg
Fancontrol and sensors
I installed lm_sensors and used pwmconfig to create a /etc/fancontrol file:
Configuration file generated by pwmconfig, changes will be lost
# cpu : temp2, pwm1, min:35, max:50
# sys1: temp1, pwm2, min:45, max:50
INTERVAL=10
FCTEMPS=hwmon0/device/pwm1=hwmon0/device/temp2_input hwmon0/device/pwm2=hwmon0/device/temp1_input
FCFANS=hwmon0/device/pwm1=hwmon0/device/fan1_input hwmon0/device/pwm2=hwmon0/device/fan2_input
MINTEMP=hwmon0/device/pwm1=35 hwmon0/device/pwm2=45
MAXTEMP=hwmon0/device/pwm1=45 hwmon0/device/pwm2=50
MINSTART=hwmon0/device/pwm1=150 hwmon0/device/pwm2=150
MINSTOP=hwmon0/device/pwm1=100 hwmon0/device/pwm2=100
On a hot summerday the sensors command outputs:
it8720-isa-0228
Adapter: ISA adapter
in0:         +1.04 V  (min =  +0.00 V, max =  +4.08 V)
in1:         +1.62 V  (min =  +0.00 V, max =  +4.08 V)
in2:         +3.28 V  (min =  +0.00 V, max =  +4.08 V)
in3:         +2.96 V  (min =  +0.00 V, max =  +4.08 V)
in4:         +3.07 V  (min =  +0.00 V, max =  +4.08 V)
in5:         +1.97 V  (min =  +0.00 V, max =  +4.08 V)
in6:         +4.08 V  (min =  +0.00 V, max =  +4.08 V)
in7:         +2.16 V  (min =  +0.00 V, max =  +4.08 V)
Vbat:        +3.25 V
fan1:        198 RPM  (min =    0 RPM)
fan2:        941 RPM  (min =    0 RPM)
fan3:          0 RPM  (min =    0 RPM)
fan4:          0 RPM  (min =    0 RPM)
fan5:        521 RPM  (min =    0 RPM)
temp1:       +48.0°C  (low  = +127.0°C, high = +127.0°C)  sensor = thermistor
temp2:       +40.0°C  (low  = +127.0°C, high = +60.0°C)  sensor = thermal diode
temp3:       +45.0°C  (low  = +127.0°C, high = +127.0°C)  sensor = thermistor
cpu0_vid:   +1.550 V
Other applications
To get the most from a multicore CPU some appliations needs to be configured to use all cores.
- Blender: works out of the box, if not check render settings (F10) for “Threads: 4”
- The GIMP: should also use all four cores, else check enviroment settings
- OGMRip: go to profiles, edit a profile and in the “Video” tab increase the number of threads to 4
- Makepkg: edit /etc/makepkg.conf and set MAKEFLAGS=”-j5″ (Yes 5, one pr core + 1)
CPU frequency scaling
I use the ondemand CPU frequceny scaling governor, so most of the time all four cores run at 800MHz and only switch to 2.6GHz when it is needed. I have put the following in my /etc/rc.local:
for i in 0 1 2 3; do
  echo ondemand > /sys/devices/system/cpu/cpu${i}/cpufreq/scaling_governor
  echo 1 >/sys/devices/system/cpu/cpu${i}/cpufreq/ondemand/ignore_nice_load
done